Monday, 17 December 2018

Chocolate Florentine shortbreads

Chocolate Florentine shortbreads

Dang, it’s mid-December already. How did that happen?! At the start of this year, I was determined to work harder on this blog and produce at least one post a month. Clearly I have failed miserably. Rubbish, I know, but hopefully you will forgive me when I explain why I've been AWOL for so much of 2018...

Chocolate Florentine shortbreads

Yes, I bring good tidings and Christmas cheer in the form of a new addition to the Darbyshire family – due in about five weeks’ time!

                            Chocolate Florentine shortbreads

Understandably, you may be wondering why, if the baby isn't here yet, I've been too busy to post anything new. Not to put too fine a point on it, for the first three months of pregnancy, I really couldn't face food - even chocolate, which I've very rarely gone a day without. After that, well, I suppose Dr D and I just got busy with baby prep. There was a nursery to be decorated, antenatal classes to be attended, adorable clothing to be bought, yada yada...
 
Chocolate Florentine shortbreads

So now we find ourselves in December with only a paltry number of posts to show for the year. I can but endeavour to make it up to you with this current festive offering.

                       Chocolate Florentine shortbreads

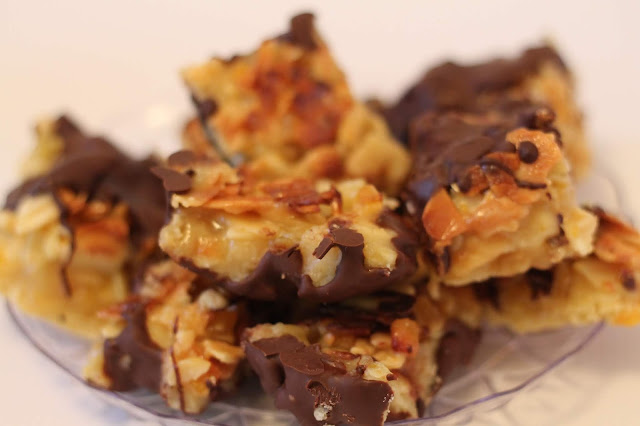
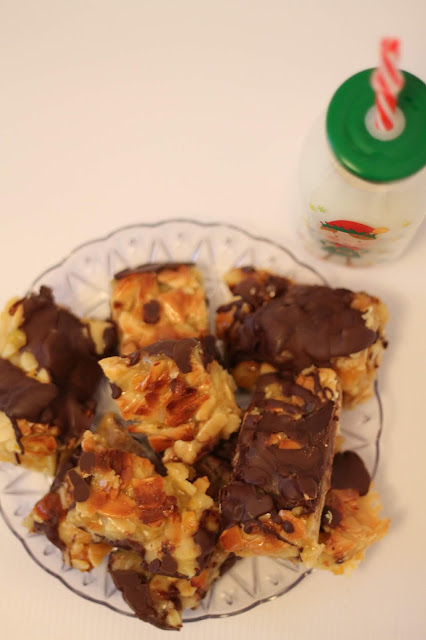
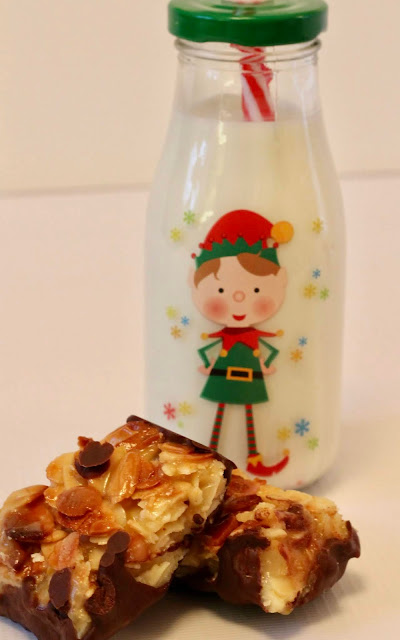
I'm going to be honest with you here. these biscuits were a bit tricky to make. Not necessarily difficult, just faffy. If that's not your style, stick with my easier Christmas shortbread, but if you're up for a challenge, definitely try these. I wasn't sure how they'd turn out but people raved about them, so I'd say they're worth the faffage. Some felt they tasted more like cake or cookies than shortbread, but either way, they were no complaints, so I'd say give them a go.
                               Chocolate Florentine shortbreads

Now, I shall take this opportunity to wish you a very Merry Christmas and a wonderful New Year. Hopefully we shall be reacquainted early in 2019, but I know better than to make any promises this time around. If it does take me a while to get back to the blog, at least you'll know the (very happy) reason why!

For the shortbread:
  • 250g plain flour 
  • 125g corn flour 
  • 250g unsalted butter, softened 
  • 125g caster sugar 

For the Florentine topping (adapted slightly from Pierre Herme's Chocolate-dipped Florentine Shortbread recipe):
  • 120ml double cream 
  • Finely grated zest of 1 orange 
  • 225g caster sugar 
  • 1 tablespoon golden syrup 
  • 80ml water 
  • 120ml honey 
  • 115g unsalted butter 
  • 320g flaked almonds 
  • 115g finely diced mixed peel 
  • 340g plain chocolate (40-50% cocoa) 
You will also need a baking sheet with a rim. I used a 28cm x 17cm one, which was a bit too large, but just about did the trick. Ideally use one that's about 23cm x 17cm.

To make the shortbread, start by greasing a lining the baking sheet with greaseproof paper and pre-heating the oven to 160c (fan).

Place the flour, corn flour, butter, and caster sugar in the bowl of a food processor and pulse until the mixture comes together to form a soft dough.

Tip the dough onto the baking sheet and press it firmly and evenly out over as much of the sheet as possible. I was left with about a 5cm x1 7cm gap at the end as my sheet was too large for all the dough. Not the end of the world, but it's better if you can a smaller one as it'll make life easier when making the Florentine topping.

Prick the dough all over with a fork, then chill in the fridge for 10 minutes. After this, bake for 20 mins, remove from the oven and transfer the baking sheet onto a wire cooling rack.

At this point, turn the oven temperature up to 180c (fan).

To make the Florentine topping, put the cream in a small saucepan with the orange zest. Place over a medium heat until the cream starts to bubble, then remove from the heat and set aside to infuse.

Place the sugar, golden syrup and water into a medium to large heavy-based saucepan and bring to a boil over a medium heat, resistng the temptation to stir. The mixture will caramelise gently. As you see this happening (the sugar and syrup will dissolve and you'll start to get a light blonde colour), swirl the pan from time to time. After about five minutes, the caramel should become a dark blonde colour.

Once the caramel is dark blonde, remove it from the heat and carefully pour in the warm, infused cream and add the honey and butter.

Place back on a medium heat and bring to a simmer for 3-4 minutes, stirring now and then to help the butter to melt. Then remove completely from the heat and fold in the flaked almonds and mixed peel.

Now the faffy bit (if your baking sheet, like mine, is too large): Pour/spread the caramel mix over the shortbread base using a spatula or palette knife. If you have too large a baking sheet, you will find some of the caramel will start to run off the biscuit into the bit of the sheet where there's no biscuit dough. Try to gently pour it back over the biscuit but don't fret about it too much - most of it will stay on the biscuit dough.

Return to the oven and bake at 180c for a further 15 minutes until the florentine topping is golden.

Transfer the baking sheet onto a cooling rack. If you want, at this point you can try with a spatula to spread the caramel that's run off into any gaps back over the biscuit (see what I mean about needing patience?!). Then leave to cool completely.

Once cool, run a palate knife around the edge of the baking sheet to loosen and slide the parchment paper onto a work surface. Cut the shortbread into squares or rectangles (as big or small as you please!) using a sharp, large knife. You may find it's very crumbly and not easy to cut, if so, try refridgerating for a while before cutting, but avoid the caramel going too hard, otherwise cutting will really get difficult.

Lastly, line 2 large baking sheets with wax paper and melt the chocolate in a bowl in a microwave or over a bain marie. Dip each biscuit into the chocolate and then set it on the prepared baking sheets. If you want pretty biscuits, try dipping just a corner. I ended up dipping the whole biscuit base (or in some cases, for a bit of variety, the caramel top) as it was quicker and I like more chocolate on them.

Refrigerate until the chocolate is set. Stored in an airtight tin, the biscuits will last a good 6-7 days.
Thursday, 27 September 2018

Chocolate bar drip cake

Chocolate bar drip cake

In case I've not mentioned it before, I have a very clever twinny. When we were mere nuggetitas in our mumma's tummy and the brain cells were divvied up, it had clearly been pre-determined that she would get all the brains and I would get all the, well, the vapidity!

Chocolate bar drip cake

Were I to list all of twinny's achievements this would possibly turn into the longest blog post ever, so I shall refrain and instead we'll just focus on the latest: after a year of intense studying (alongside her full-time day job saving lives!!!) and undergoing eight hours of gruelling written and oral examinations, twinutha passed her Surgical exit exam (first time around, might I add!) to officially become a member of the Fellowship of the Royal College of Surgeons.

What this means to us non-medics is that she can now practice as a senior surgeon, hopefully saving even more lives than before, and consequently the rest of us can sleep a little more easily, knowing we have a superhero in our midst. Hurrah!

Chocolate bar drip cake

In case it isn't already glaringly obvious, I'm super proud of my biological other half (to distinguish from my marital other half - of whom, of course, I'm also very proud!) She's spent half her life studying and slaving away, dedicating herself to be the best doctor she can be. She may also have thoroughly relished sharing gruesome surgical details and pictures with her squeamish twin along the way, but we won't go into that...

Chocolate bar drip cake

So to celebrate the superstardomness of my lil' sis (hey, that one minute counts!), I felt the least she deserved was a cake: a full-on chocolate-sponged, chocolate-frosted, chocolate-coated, chocolate-topped cake (the kind that, ironically, many of her patients are possibly meant to avoid!) And so I made my very first chocolate bar drip-cake. I know drip cakes and chocolate bar-topped cakes have been around for a while, but for one reason or the other, I've not had occasion to make them before.  Thanks to twinny, I now did.

Well done twinny, so immensely proud of you. xxx

Chocolate bar drip cake

For the cake and frosting:
The sponge for this cake comes from my Easy-peasy chocolate orange fudge cake recipe, but instead of a chocolate orange sponge, I elected for vanilla extract this time around. For a taller cake - which is possibly preferable for drip cakes - you can times the recipe ingredients by 1.5 (use 5 medium eggs rather than trying to crack 4.5 large ones!) and split the batter between three 8"/20cm tins rather than two.

Likewise increase the frosting quantity by 1.5 times, using 300g each of butter, icing sugar and chocolate.

To assemble, once the cake are cool, place one of the sponges upright on your serving plate. With a palette knife or spatula, evenly spread about a quarter of the frosting over the top of the sponge.

Place the second sponge on top of the iced first sponge and gently press it down so that it sits comfortably and isn't sliding around. Cover the top of this with another quarter of the icing, then top with the remaining sponge, again gently pressing it into place.

Evenly spread the remainder of the icing around the sides of the cake - be generous here, ensuring sure the sponge isn't visible through the frosting - and finally over the top, smoothing the icing as much as you can along the way.

Allow to set in the fridge for at least an hour.

For the decoration:
  • 150g double cream
  • 150g plain chocolate (40-50% cocoa), chopped into small pieces
  • As many different chocolates as you wish to top your cake with (I aimed for different sizes and textures as well as flavours, using: Laduree chocolate hazelnut macarons; Ferrero Rochers; mini Mars bites; Snickers bars each chopped into pieces; orange Matchmakers; a chopped up Flake; Monty bojangles truffles; and a slab of Chococo honeycomb chocolate broken into shards. Phew!)

For the drip decoration, you will need to make a chocolate ganache by heating the cream in a small saucepan on a low heat until it just starts to simmer. As soon as it does so, remove from the heat and add the chopped plain chocolate into the pan.

Allow the chocolate to sit in the heat of the cream for about 30 seconds, then gently stir the two with a spatula until fully combined and you have a glossy, thick ganache. Set this aside to cool a while. You want it to thicken slightly but still be runny enough to drip.

When you're ready to decorate the cake with the chocolate drips, put about 2tbsp of the ganache in a piping bag with small round nozzle, saving the rest for later. Place the nozzle at the rim of the top of the cake and gently squeeze, allowing a drip of ganache to come out and run, or dribble, down the side. It should be thick enough to stop running down all the way to the base of the cake. If it's too runny, leave the ganache to cool a few minutes longer. If it's not runny enough, heat in the microwave for 2-5 seconds (no more!)

Leaving a small gap of about 2cm along the circumference of the cake, repeat the drip process. Use more ganache for a longer drip or or less for a shorter drip. You may want some of the drips to go down all the way to the base - it's entirely up to you. Continue all the way around the circumference of the cake with different length drips. If there is still some ganache left in the piping bag when you've finished the drips, save it for sticking the chocolate bars on top of the cake.

Once the drips are done, cover the top of the cake with the remaining ganache that's not in the piping bag, gently spreading it right to the edges with a palette knife, to cover the whole top and smoothing it out as much as possible. 

Now the fun bit! Decorate the top of the cake (and sides if you wish) with your stash of chocolates and chocolate bars! If you want to pile the chocolates on top of one another, use blobs of ganache from the piping bag to 'glue' them together.

For the message, I used melted white chocolate and a piping bag with a small round nozzle. I piped free-hand onto a piece of parchment paper, allowed the piped message to set in the fridge, then gently lifted the piped writing and placed it on the cake before adding my chopped chocolates. 

Tuesday, 6 March 2018

Ensaïmadas


A couple of years ago I went on an organised trip to Mallorca to improve my Spanish. The trip was an interesting one, to say the least. In terms of my overall goal of becoming better at Spanish, without doubt, it helped. I also got to see some beautiful parts of Mallorca that I never knew existed.


Those things aside, looking back, unfortunately, the trip was all too reminiscent of being back at school: basic accommodation with shared bathrooms (I don't cope well with shared bathrooms); a scatty teacher who, ironically, seemed to require being kept in check by her pupils rather than the other way around!; and cheap food.


I'm pretty sure Mallorca has some hidden gems for restaurants, should one choose to seek them out, but being on an organised trip, we ate where we were taken: think 'all-you-can-eat' buffet restaurants, churning out vats of low quality slop. One was not amused.


My disappointment with the food was compounded when we were taken to a Spanish bakery. I'm always excited about visiting bakeries abroad and this was no different. I could barely contain myself when we were told about ensaïmadas - coil-shaped pastries made from sweet, enriched* bread dough, which derive from Mallorca itself. A sugary treat, fresh out of the oven and authentic to the place I was visiting! What more could I ask for?!

And yet, just as I was about to wrap my droopy jowls around one, I learnt that they were made with lard...


If you're confused about why this was problematic, let me explain: As a Muslim, I don't do lard.

My disappointment was overwhelming. Whilst this trip was supposedly all about learning Spanish, secretly (or, for those who know me well, not so secretly!), as with all my travels, it was as much about the food.


Fast forward two years and the Hairy Bikers, on their amazing Mediterranean Adventure, presented me with a recipe for ensaïmadas that uses butter instead of lard. The joy! Finally, I would get to have my ensaïmada and eat it!


This recipe adds almond paste into the mix. For extra flavour, and to complement the almond, I also added lemon zest and, in some of the hand-shaped pastries, some chocolate chips. To be honest, a lot of things could work: Nutella and hazelnuts instead of the almond and lemon, or a pistachio paste with chocolate chips. I also think slitting the baked rolls length ways and sandwiching them with whipped cream would work a treat. Whatever you go opt for, I recommend you enjoy them fresh out of the oven, with a big pot of tea!

*An enriched bread dough is a normal bread dough that has butter, sugar, milk and/or eggs added to it.

Adapted slightly from The Hairy Bikers' recipe for Ensaïmadas

Makes 16

For the dough:
  • 500g plain flour, plus extra for flouring/dusting work your surface
  • 150g caster sugar
  • 2 tsp dried yeast
  • pinch salt
  • 200ml tepid whole milkplus extra for milk wash (to brush over the ensaïmadas before they go in the oven - this will help to give them a golden colour)
  • 2 large eggs, beaten
  • oil, for greasing (I used olive)
For the almond paste:
  • 100g caster sugar
  • 100g softened unsalted butter
  • 100g ground almonds
  • few drops almond extract
  • zest of one lemon
  • 200g chocolate chips (optional)
You will also need some icing sugar for dusting over the baked rolls.

To make the bread dough, tip the flour, caster sugar, yeast and pinch of salt into the bowl of a stand mixer fitted with a dough hook (you could knead the dough by hand, but it will take a lot longer and is hard work!) Use a balloon whisk to give the ingredients a quick mix to combine before attaching the bowl to the mixer.

Heat the milk in a pan until tepid, then mix with the eggs in a jug.

Turn your freestanding mixer on and, with the dough hook rotating through the dry ingredients, slowly pour in the milk and eggs. Knead with the dough hook until the dough is soft and smooth and not sticky. This will take a while, so be patient.

Once the dough is ready, transfer it to an oiled bowl and cover loosely with a damp cloth or clingfilm. Leave in a warm place (I left mine by the boiler) for a couple of hours to rise.

To make the almond paste, beat the sugar and butter together with a handheld electric whisk until soft and pale. Add the almonds, almond extract and the lemon zest and whisk again. Put to one side until you are ready to shape and fill the 
ensaïmadas.

Once the dough has had a couple of hours to rise, transfer it to a floured work surface and cut it with a large, sharp knife into 16 pieces (you could weigh them if you want them to all be exactly equal in size, but I just cut them roughly by eye).


The pieces can now be rolled and shaped, but as you will be working on them one at a time, keep them covered with a damp tea towel to stop them from drying out; removing each piece from below the tea towel only as and when you are ready to shape it.

Taking your first piece of dough, roll it into a ball 
with your hands (don't worry about it being exactly spherical or smooth). Now, using a rolling pin and on a floured surface, roll the ball out to a very rough circle of 18-2cm.

Take a dessert spoon or so of the almond paste and gently spread it, with an offset spatula or palette knife, over the rolled dough, leaving about a 1cm small border all the way round. 

Now roll the circle of dough up tightly. Once rolled, with your hands, gently roll/elongate or massage it into a long sausage, about 25cm long.

Finally, taking one end of the sausage, loosely roll it up into a coil, like a snail shell, tucking the outside end underneath. You need the coil to be fairly loose so that the middle of the ensaïmada has the space to rise/grow outwards in the oven, otherwise it will push upwards. Place the rolled coil onto a clean baking sheet.

Repeat with the remaining pieces of dough, arranging the 16 
ensaïmadas evenly over two baking trays. Once you've shaped them all, cover them with a damp tea towel and leave to prove again for another hour, again ideally somewhere warm.

About 45 minutes into the proving time, preheat the oven to 160C (fan).

Once the ensaïmadas have proved for an hour, brush them evenly with milk , then bake for 15 minutes until lightly golden and cooked through.

Allow the ensaïmadas to cool before dusting liberally with icing sugar. Enjoy with a hot cup of chai!

Wednesday, 14 February 2018

Banana and salted caramel layer cake

Banana and salted caramel layer cake

Oh look, it's the 14th of February. Valentine's Day. Hmm, let's discuss...

The cynical part of me - which, FYI, is about about 99.9% of me - hates this day with a passion (the irony). When I was single, I was convinced Valentine's Day was designed purely to make every unattached person in the world feel lonely and crummy about themselves. Now that I'm married, I still think it was designed to make singles feel sh*t about themselves, but evidently also to make people in relationships fork out a whole load of money to prove something their partner should already know: that they are special to them.


Banana and salted caramel layer cake

And yet as a married person, I have succumbed. Succumbed to the expectation that at the very least I should get a card from Dr D, telling me something that he tells me every single day, multiple times a day; and succumbed to the pressure that I too should make an effort to demonstrate three little words that I unequivocally express on a regular basis. I've bought into the commercialisation to such an extent that I even send flowers to my mumma and twinny, just in case they might be in doubt, on this particular day, as to whether I love them.


Banana and salted caramel layer cake

Sigh. What can I say? I am weak. Weak in the face of the big corporates who tell me I must spend my hard-earned money to prove my affections. More fool me, eh? And yet, if it brings a smile to the face of someone I love, maybe it's not such a bad thing after all. At least that's what the 0.1% part of me that's not cynical would like to believe...


Banana and salted caramel layer cake

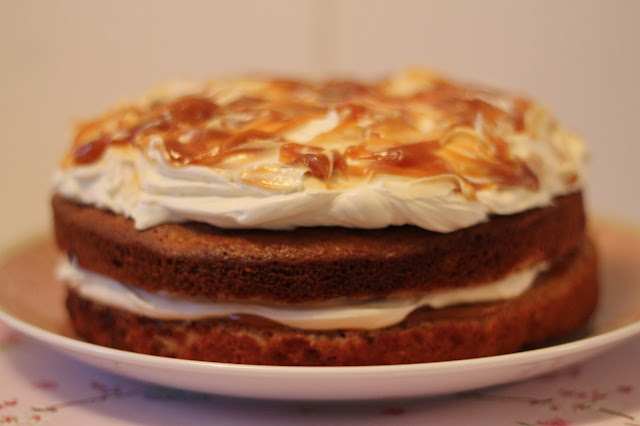
So whilst we're talking about love, let's talk about this cake, because I am definitely in love with it! This in spite of the fact that there's no chocolate in it, which I believe pretty much everything banana-related should contain. But it's okay, because in this instance there's salted caramel to complement the banana. Oh, and some double cream. OMG, it's good. In fact, if you're still scrabbling around for a Valentine's gift, just make this. Trust me, it beats red roses!


Banana and salted caramel layer cake

Serves 10-12

For the cake:
  • 2 large eggs
  • 220g caster sugar
  • 20g light brown soft sugar
  • 120ml olive oil
  • 4 very ripe, mashed bananas (300-320g)
  • 90ml double cream
  • 1 tsp vanilla extract
  • 210g plain flour
  • 1 tsp baking powder
  • ½ tsp mixed spice or ground cinnamon
  • ¼ tsp sea salt
For the filling/frosting
  • 250g mascarpone cheese
  • 300ml double cream
  • 2 tbsp caster sugar
  • 200g of salted caramel
Preheat the oven to 160C (fan) and grease and line the base of 2 x 8" cake tins with baking paper.

Beat the eggs and the two sugars together on a high speed until pale and thick, for about 5 minutes. You can do this either with a stand mixer using the whisk attachment, or with a handheld electric whisk.

Now reduce the speed of the mixer to medium and slowly pour in the olive oil until it is all incorporated.

The rest of the mixing needs to be done either using a large metal spoon or a spatula, so you can remove the bowl from the mixer/put your handheld whisk aside.

Tip the bananas, 90ml cream and vanilla into the bowl and fold them into the beaten egg, sugar and oil mixture.

Place a sieve over the bowl and sift in the flour, baking powder, mixed spice or cinnamon (whichever you are using) and sea salt and, again, fold in.

Pour the mixture equally into the two tins and pop on the middle shelf of the oven for 30 minutes or until the cakes are golden on top and a sharp knife or skewer inserted into the centre comes out clean.

Let the cakes cool for 10-15 minutes before turning them out of the tins onto a wire rack. Once they are completely cool, if you have the time, place them in the fridge until you are ready to assemble, as they will firm up, making them less liable to break.

To make the cream filling/frosting, place the mascarpone, double cream and sugar in a large bowl and whisk with a handheld electric whisk until thick but soft (you don't want the cream to go so hard you can't spread it).

When you are ready to assemble your cake, place one of the sponger on your serving plate, upside down. Using a palette knife or offset spatula, spread about 2/3 of the salted caramel over the top of the sponge, right to the edges.

Next spread about half the cream on top, this time not quite to the edges as otherwise it may ooze out when the top layer is placed on it.

Place the second sponge on top, again upside down (this ensures the cake looks nice and flat rather than domed).

Top with the remaining cream, spreading it out to the edges and undulating the knife to create nice swirls in the cream.

To finish, dot ¾ tsp blobs of the remaining salted caramel randomly on top of the cream, then gently swirl them through the cream with a palette knife to create a nice pattern.

Ideally place the cake in the fridge for a few hours before serving to let it set, as the top sponge is liable to slide around until the cream and caramel in the middle have firmed up a bit. Keep refrigerated.

Wednesday, 3 January 2018

Gingerbread and lemon layer cake with speculoos frosting

Gingerbread and lemon layer cake with speculoos frosting

I know this is going to seem somewhat philosophical, and thus incongruous both for me and for discussing on a baking blog, but do you ever wonder about why we are born into the lives we are born into? Why a specific corner of the world, a certain way of life and a specific culture were ascribed to us? I don’t often have thoughts like these – my brain is usually too addled by thoughts of food to allow for profound existential considerations – but occasionally I surprise myself with such cerebral exertions.

Gingerbread and lemon layer cake with speculoos frosting

My philosophical ruminations usually occur, perhaps unsurprisingly, when I’m somewhere that’s in stark contrast to everything I know. Most recently I contemplated why I have the life I do during a trip to Morocco, where we travelled through some fairly remote areas, so very different to anything I know - areas with villages of just handfuls of people and little by way of facilities and amenities. I couldn’t help but wonder, during such travels, at the fact that these people had a life so immensely disparate to my own.

Gingerbread and lemon layer cake with speculoos frosting

It’s difficult to elaborate here without sounding patronising, but I will give it a go: My point is, ultimately, how was it determined that I should be born in a busy Western city, with all the mod cons, a car and a social life that consists of brunches, lunches, workouts, jaunts to the countryside and trips abroad; whilst someone else should be born into a quiet, remote part of the world with a donkey for transportation, a handful of basic possessions and clothes, and, seemingly, little by way of entertainment beyond a pack of playing cards?

Moreover, how was it decided that I should have the means to get a glimpse into their world, but they are unlikely to ever have the means to see, know or understand mine? That I will get to witness their life of herding sheep and eating lentil stew or goat meat tagine on a dusty roadside, but they probably won’t ever see my world of going to meetings, deciding on the next boxset to watch, and eating a wodge of gingerbread cake?

Gingerbread and lemon layer cake with speculoos frosting

I’ve probably failed dismally in my attempt at not being patronising but I hope the gist of what I’m trying to say is coming across: I just wonder how our lots are drawn. In any case, these moments of contemplation make me appreciate what I have and feel grateful for the life I’ve been given: a life that allows me to visit a distant part of the world and indulge in syrupy-sweet Moroccan pastries, full of almonds and dates; then also return to my pretty little home and indulge in something like this gingerbread and lemon cake, slathered in a caramelly Biscoff frosting. No, I cannot complain.

Gingerbread and lemon layer cake with speculoos frosting

Twinny has declared this cake “the best cake I’ve ever eaten”. High praise indeed from one of my bluntest critics. Of course, she subsequently bemoaned the number of ingredients required to make it, but it’s honestly not hard to make and it’s truly delicious: the gingerbread and lemon complement one another so well; the sponge is a fluffy, moist delight; and the not-too-sweet biscuit frosting is ludicrously good. I beseech you to make this.

Adapted from BBC Good Food's Gingerbread cake with caramel icing

For the cake:
  • 150ml semi-skimmed milk
  • 3 tbsp black treacle
  • 375g plain flour
  • 3 tsp baking powder
  • 1½ tsp bicarbonate of soda
  • 375g light brown soft sugar
  • 3 tsps ground ginger
  • 1½ tsp ground cinnamon
  • 1½ tsp  mixed spice
  • ½ tsp table salt
  • 225ml sunflower oil, plus a little for greasing
  • 300ml buttermilk
  • 3 large eggs
  • 2 tbsps milk
  • 1½ tsp vanilla extract
  • Zest of 2 unwaxed lemons and juice of 1
  • Lemon curd (homemade or a jar of good quality shop-bought curd)
For the caramel biscuit icing:
  • 125g unsalted butter, very soft
  • 200g icing sugar, plus a little extra for dusting
  • 185g full-fat cream cheese
  • 1 tsp vanilla extract
  • 150g crunchy caramelised biscuit spread (I used Lotus Biscoff biscuit spread)
  • 25g desiccated coconut, to decorate
  • Lebkuchen or gingerbread biscuits (optional)
To make the cake, first place the milk and treacle in a small saucepan (if you grease the measuring spoon with a little oil first, the treacle will easily slide off). Put the pan on a very low heat, allowing the treacle to melt gradually into the milk (I have a little metal sheet with a handle that I set between the pan and the heat, so that the heat isn't as direct). As the treacle starts to melt, stir to combine it with the milk, then set aside to cool.

Grease three 8"/20cm loose-bottomed cake tins with oil and line the bases with baking paper If your tins are shallower than 4cm, line the sides with a deep collar too.

Heat your oven to 160C fan.

Tip the flour, baking powder, bicarbonate of soda, sugar, spices and salt into a large bowl and whisk them all together with a balloon whisk. If your sugar is lumpy, use your fingers to crush the lumps until you have an even, sand-like mixture.

In another bowl, whisk the oil, buttermilk, eggs and vanilla together, then add the milk and treacle mixture, and whisk again.

Pour the wet ingredients into the dry, and slowly whisk them together to combine. Once they start to come together, you can whisk more vigorously until you have a smooth batter.

Lastly, add the lemon zest and juice and beat one final time.

Pour the batter as evenly as you can between the three tins and bake for 25-30 mins until a skewer or sharp knife plunged into the centre of the cakes comes out clean. You may have to swap the cakes over to cook evenly, but don’t do this until they’ve had at least 20 mins cooking, otherwise they will sink!

Cool the cakes in their tins for 10 mins, then transfer to a wire rack, peel off the parchment and leave to cool completely.

For the icing, put the butter and half the icing sugar in a large bowl and gently squish them together with a wooden spoon to bring them together. As they start to combine (and you're confident the icing sugar isn't going to go flying everywhere!) beat with an hand-held electric whisk until smooth, although you could probably make do with just the wooden spoon if the butter is soft enough. Add the remaining icing sugar and repeat the process.

Now add the cream cheese, vanilla bean extract and biscuit spread. Mix again until smooth and evenly mixed.

Now for the best bit - building the cake! Place one of your sponge layers upside down on the plate you wish to serve the cake on. With a palette knife or offset spatula, spread a good dollop of lemon curd evenly over the top (which is really the bottom) of the sponge. Using a clean palette knife or spatula, now spread about a quarter of your frosting over the top of the sponge.

Place the second layer of cake over the first - the right way up this time - and repeat the process of spreading with lemon curd and frosting.

Place the third and final sponge on top of the first two, upside down again. Now cover the sides of all three sponges with a thin layer of frosting, scraping gently as you go so that some of the sponge shows through the frosting. Use the last bit of frosting to cover the top of the cake, either smoothing it with the knife, or using the knife to make peaks in the frosting.

Lastly, sprinkle the desiccated coconut over the top of the cake and dust it with some icing sugar. If you're using Lebkuchen or gingerbread, place them around the top and sides of the cake for decoration.