Friday, 18 December 2015

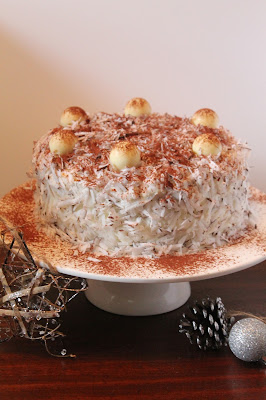
Coconut and clotted cream cake

clotted cream and coconut cake

Looking back on previous posts, I've realised that I've written several times about my love of Christmas. So many times, that I probably shouldn't be writing about it again. But it's December and I just can't seem to help myself, because I'm like a child when it comes to Christmas. Okay wait, I'm like a child most of the time, but with Christmas my inner five year-old truly comes out to play. I absolutely love this time of year and for 2015 I'm more excited than ever because it's my first true Christmas and my first one with my husband!

clotted cream and coconut cake

To that end, I've gone all out: I've insisted on advent calendars (again, a first for me); I've never had a tree before so to make up for it we have two, under which there is a growing pile of presents; and of course, my Elf DVD has made its annual appearance (the jokes have me in fits of giggles every single time). You'd be forgiven for thinking there is an actual child in our house, not simply a grown-up unable to stop acting like one.

Still, I don't give a fudge; I refuse to be an apologist for my all-embracing love of Christmas films, songs, jumpers, crackers, decorations and all-round Christmas cheer. Why? Well, quite simply because it makes me happy.

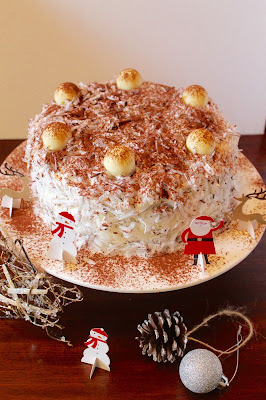
clotted cream and coconut cake

This cake, although not particularly Christmassy in flavour, for me very much looks the part with its snow-white layer of smooth mascarpone frosting, topped with brilliantly white flakes of fresh coconut. And although there are no Christmas spices or mincemeat etc., in it, it really is a deliciously comforting cake to partake in a slab of (avec cup of chai!), after a long day of Christmas shopping. The sponge is light and moist and the clotted cream and jam filling decadently and joyously soothing on a cold day.

Note that the first time I made this cake, inspired by the blog Mostly About Chocolate, I placed the clotted cream in the cake batter, as a direct substitute for butter. I also added chocolate chunks into the batter. I found however that the clotted cream made the cake crumb too tight and dense; and although I'd never admit this to anyone, for once I felt that chocolate seemed incongruous.

clotted cream and coconut cake

So I made the cake again, this time making my usual Vicky Sponge i.e. butter/margarine in the cake mix, not clotted cream, and omitting the chocolate altogether (treachery!) The clotted cream wasn't foregone completely. Instead I used it together with some lovely Bramble jam (a wonderful alternative to strawberry and raspberry jams) to sandwich my two sponges together before slathering on the coconut cream cheese frosting. Much better.

If you're concerned about my well-being after the chocolate omission, don't worry, I managed to crowbar some in in the form of some lovely Lindt balls on top for decoration. Party in my tummy!

clotted cream and coconut cake

For the cake:
  • 225g unsalted butter or Stork
  • 225g caster sugar (that's ideally been infused with a vanilla pod)
  • 4 large eggs, lightly beaten
  • 225g self-raising flour
  • 1tsp baking powder
  • 1 tbsp vanilla extract
For the filling:
  • Good quality jam (I used seedless bramble jam)
  • 227g tub Cornish clotted cream (I used Rodda's)
For the coconut frosting:
  • 250g mascarpone
  • 200g fromage frais
  • 1tsp vanilla extract
  • 100g icing sugar, sifted
  • One fresh small coconut, shelled, peeled and coarsely grated

To decorate (optional):
  • Six Lindt chocolate balls
  • Cocoa powder for dusting
To make the cake, preheat the oven to 180C (or 160C for a fan oven). Grease and line two 8" sandwich tins.

Cream together the butter and sugar until they are pale and fluffy.  If you're using a freestanding mixer, use your K-beater attachment and beat for a good few minutes until the butter and sugar are so light and airy, they resemble whipped cream.


Add the lightly beaten eggs and beat again briefly. The mixture may look lumpy and/or curdled, but adding flour in at the next stage will rectify this.

Sift the flour and baking powder together three times, then add a third to the butter, sugar and egg mix and beat to incorporate before adding another third, beating again, and then adding the final third and beating.

Lastly, add the vanilla extract and give your batter one final good mix before splitting equally between the two tins.

Bake in the oven for 20-22 minutes. To check the cakes are cooked, insert a clean knife into them; it should come out of the cakes with only moisture and a few crumbs on it. If there is gooey batter on the knife, give the cakes another two to three minutes in the oven.

Once baked, remove from the oven and allow the cakes to cool slightly before removing them from the tins and placing on a cooling rack.

To make the frosting, place all of your ingredients, except the grated coconut, into a bowl and beat together until smooth.

To assemble, place one of your cake sponges onto the plate you'll be serving the cake on. Using a palette knife, spread a generous amount of jam all over the top of it, followed by the clotted cream.

Place the second sponge, upside down, on top of the jam and clotted cream-covered sponge.

Dollop three or four tablespoons of the cream cheese frosting onto the top of the cake. Again using a palette knife, gently spread the frosting evenly over the top. Once this is done, spread more frosting around the side of the cake, working all the way around until it's all covered.

Finally, taking a small handful of grated coconut at a time, pat it onto the sides of the cake, pressing gently so that it sticks to the frosting. Once the side is all covered with coconut, sprinkle the remaining gratings over the top of the cake.

Decorate with Lindt balls and a dusting of cocoa powder if desired.

Thursday, 12 November 2015

Apple and blackberry crumble (twice-baked)

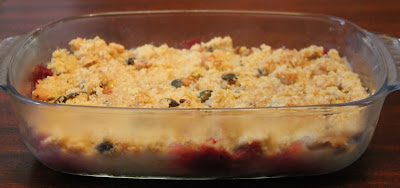
Twice-baked apple and blackberry crumble

Last week Dr D and I visited one of my favourite chocolate and patisserie shops, William Curley, to indulge in an experience the chocolatier offers customers called the ‘Dessert Bar’. The Dessert Bar is basically my idea of heaven. Instead of sitting down to a five course meal, of which one course at most is likely to be of the sweet variety, you get to sit down to five courses, all of which are sweet. That’s right. ALL. OF. THEM. Five courses. All containing sugary goodness.
Twice-baked apple and blackberry crumble
Now as any dedicated athlete would do, I took my training in anticipation of the dessert bar very seriously: lunch was foregone - heck so was breakfast that’s how committed I was to the cause; and I walked the seven miles there from home in order to really build up an appetite and make sure that every single morsel of dessert could be enjoyed when I finally arrived in an exhausted, famished, somewhat dishevelled heap a few hours after the start of my journey.
Twice-baked apple and blackberry crumble
As it turns out, I perhaps didn’t need to have undergone quite such a gruelling training regime - though I’d like to think Mo Farah would be proud of my dedication - as each course was fairly small; gone in about three dainty teaspoons-full. I begrudgingly admit that this is probably rather sensible as we none of us would wish to end such a delightful experience in a diabetes-induced coma. As well as being on the petite side, a couple of the desserts were of the sorbet, granita or jelly variety so there was no danger of eating so much stodge that I turned into a pudding myself, albeit, given the opportunity, the ziggy-piggy in me would be willing to give it a darn good go.
Apples and blackberries
Anyhoo, the stand-out dessert for me of the five courses was a lovely pear and bramble crumble. It arrived ‘deconstructed’, which I know may irk some people, but the fact is, if it hadn’t already been, it was only going to meet that very fate a few seconds after being placed in front of me. So what they hey, as far as I was concerned, it just made shovelling the delicious, caramelised, fruity wonder into my mouth all that bit easier.
Twice-baked apple and blackberry crumble
Now, as it so happens, my mum, more commonly known by her rapper's name, K-Dub, is famous in my family for her apple crumble and I very recently finally found the time to get the recipe from her and make it myself. I made mumma’s recipe again a few days back, and I’ll be honest, it’s so good, it doesn’t really need to be tweaked with. But I couldn’t help myself.
So this time I decided to brown the butter for the apples before throwing in the sliced fruit, making the compote more nutty and caramelised in flavour. I also added blackberries, a favourite of Dr D's, into the mix once the apples had cooked down. The bigger tweaks though were to the crumble, to which, inspired by the one I tried at William Curley, I added hazelnuts and seeds for a more varied taste and texture. Finally, I chose to bake the crumble topping twice for extra-crunchy crumbliness: once on its own on a baking sheet; the second time after it had been scattered over the compote. This might seem like extra effort, but honestly, I think it's worth it as the resulting crumble is deliciously crunchy and crispy. It’s even received a  thumbs up from K-Dub herself, which means it must be good!
Adapted from K-Dub's famoso apple crumble

Ingredients
Serves 8-10

Fruit compote:

  • 100g unsalted butter
  • 3 tbsp caster sugar
  • 1.3-1.5kg Bramley apples, peeled, cored and sliced - place in a bowl of cold water with juice of a lemon squeezed in to stop them turning brown before cooking
  • Zest of one lemon
  • 10-12 cloves
  • 250g blackberries

Put the butter and sugar in a large saucepan or large, deep frying pan and melt together over a medium-low heat. Heat for 3-5 mins until the mixture turns to a light caramel - it will start to bubble and foam and let out a sweet, nutty aroma. At this point, add the apples. Don't worry if some of the water they are in goes into the pan too, it will help to stop the compote becoming too thick or dry.

Mix the apples in the butter and sugar mix, making sure they're all coated, then add the lemon zest and cloves, place a lid on the pan and cook on a medium-low heat for about seven or eight minutes, Stir the apple slices about halfway through the cooking time to break them up a bit - the end result should be a squishy, lumpy compote, not still-in-tact apple slices. After 7-8 minutes of cooking, you should have a thick compote (the apple slices will have broken down), but it should have retained some of the liquid from the apples and not be dry. At this point, turn off the heat and take the lid off the pan to allow the apples to cool completely.

Once the apple compote is cool, fish out the cloves (I know!) and tip the compote into a large ovenproof gratin dish. Scatter the blackberries over the top.

Crumble topping:
  • 300g plain or s-r flour
  • 150g chilled unsalted butter, cubed
  • 150g demerara sugar, plus extra for sprinkling
  • 25g pumpkin seeds
  • 25g sunflower seeds
  • 35g blanched hazelnuts, roughly chopped
Preheat oven to 180C fan.

In a large bowl, rub the flour and butter cubes together with your fingers until you have a breadcrumb consistency. Tip in the sugar, seeds and hazelnuts and stir through the crumble mix with a large spoon.

Spread the crumble mix out evenly over a baking sheet (or two if necessary) and bake in the oven for 10 mins.

Remove from the oven and use a large spoon to top over the compote. You may have large chunks of crumble - keep as they are, or break up as your spoon over the crumble, depending on your preference. Sprinkle a liberal amount extra demerara on the top of the crumble for extra crunchiness once it's fully baked.

Reduce the oven temperature to 160C and bake the whole crumble for another 15 mins if cooking straight away. If finishing the bake at a later point and you've had the unfinished crumble in the fridge, bake it for another 30 mins, or until the compote is bubbling and the crumble is nice and golden on top.

Wednesday, 28 October 2015

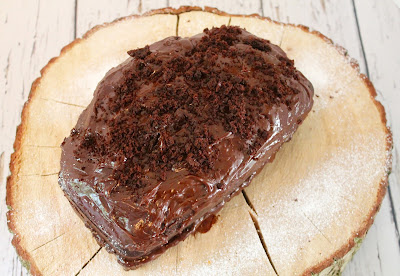
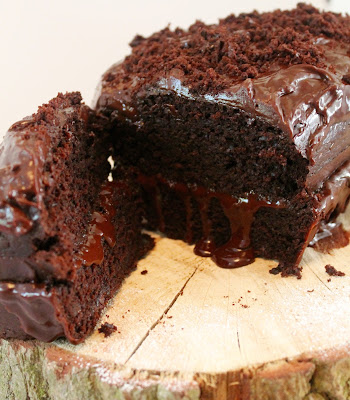
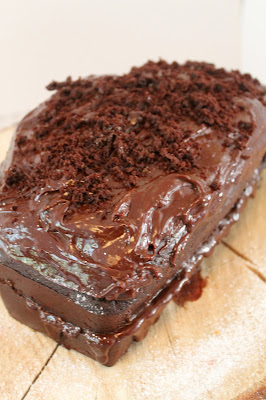
Squidgy chocolate orange loaf cake

Squidgy chocolate orange loaf cake

Oh crumbs, it's been months since my last blog post! When I first started A Cup of Tea Solves Everything, I promised myself that I would do at least one post a month. No doubt you’ve all been crying into your pillows with every passing day, wondering what’s happened. What can I say, I've let us all down; I can only apologise, but for what it's worth, I have genuinely been kind of busy. You see...

I got married!!!!!!!!!!!!!!!!!!!!!!!!!!!!!!!!!!!!!!!!!!!!!!!!!!!!!!!!!!!!!!!!!!!!!!!!!!!!!!!!!!!!!!!!!!!

Squidgy chocolate orange loaf cake

That's right, I am very happy to report that I am now officially Mrs Rana Darbyshire, (although I also answer to Lady Darbyshire should you so prefer). I got engaged shortly after my last post and, as you might imagine, life since then got somewhat bonkers, especially as we gave ourselves all of only four months to arrange our wedding.

Squidgy chocolate orange loaf cake

I realise I’ve been somewhat remiss in not mentioning the ever so lovely and wonderful Dr D to you before, but whilst I am happy to share much of my life with you, dear reader, there are some aspects of it that I’ve always been rather circumspect about. I can only hope that the steady(ish) stream of cakeage up until now will prove enough for you to forgive me. Now that we’re married though, I think we can take it as a given that you’ll be hearing more about the good Doctor (PhD. Physics before anyone decides to start emailing me their ailments) in due course! For now, suffice to say, he’s everything I’ve ever hoped for and more.

Moving swiftly on before I make anyone too nauseous, husband included(!), I can’t say I pushed myself particularly hard in terms of baking skills for my first post-wedding blog bake, but there is a fitting reason that I chose to make this particular cake.

Squidgy chocolate orange loaf cake

You see, our wedding cake was a beautiful rustic - or ‘naked’ - chocolate orange (what else?) mud cake, filled with ganache and decorated with fresh berries, flowers and a light dusting of icing sugar. In case you’re wondering, a naked cake is a wedding cake that isn’t covered with icing, so you get to see the sponge and filling in all its glory and don’t have to faff around with peeling off sickly-sweet fondant icing that anyone above the age of about 10 seems to loathe before you get to dig in. Simple, elegant and yummy in one’s tummy!

So this first post, albeit not a mud cake, is a tribute to our glorious wedding cake. It’s ridiculously simple to make and seriously delicious when filled and topped with a ganache and studded with some hidden nuggets of chocolate in the midst of the loaf. Even yummier in one’s belleh if the sophistication is taken down a notch and you opt to drown a doorstep-sized wodge of it in a huge puddle of custard! Mmm, custard…!

Squidgy chocolate orange loaf cake

Adapted from Jo’s Blue Aga’s Very Squidgy Moist Chocolate Loaf 

Ingredients
Yields about 10 slices, plus a few extra muffins

For the cake:
  • 175g softened butter or Stork (I used Stork)
  • 175g soft light brown sugar
  • 75g cocoa powder
  • 150ml just-boiled water
  • 200g self-raising flour
  • 1/2 tsp bicarbonate of soda
  • 4 large eggs
  • 250g plain chocolate (40-50% cocoa), chopped into chunks
  • Zest of an orange

For the ganache:
  • 150ml double cream
  • 150g plain chocolate (40-50% cocoa)
  • 30g unsalted butter, at room temperature and cubed into roughly 2cm blocks
  • Zest of an orange

Pre-heat oven to 180C (fan oven) and grease and line a loaf tin with greaseproof paper. I used a 2lb tin (21 x 8cm if you need dimensions), which was just about big enough for the sponge but the cake did come out somewhat over-sized and lop-sided as a result of me overfilling the tin, so I would recommend lining a muffin tray with a few cases in addition to preparing your loaf tin. That way, rather than pouring all the batter into the tin, you can save about a quarter of it and bake a few muffins on the side.

Place the butter or Stork, sugar, cocoa and water into a large saucepan. Heat gently until the butter has melted, the sugar has all dissolved and your ingredients have combined, stirring as you go. Once everything is a glossy liquid, take it off the heat, stir in 100g of the chocolate chunks (which will melt in the heat of the molten gloop)  and allow to cool, for at least 10 minutes.

Sift the flour and bicarbonate of soda into a large mixing bowl. In a separate bowl, whisk the eggs lightly, then pour the chocolate liquid from your saucepan and the eggs into the flour all in one go. Beat together with a wooden spoon or a spatula until smooth. Now add in the remaining 150g of chocolate chunks and the orange zest and mix through the batter.

Pour about three quarters of the cake mix into the prepared tin, using the rest in your muffin cases. Bake the loaf for 10 minutes at 180C, then reduce the temperature to 140C and bake for another hour or until a knife inserted into the cake comes out clean. As the baking time for the muffins will be very different, I would bake these separate to the loaf cake (about 25 minutes on 160C fan should be enough, or again, until a skewer or knife comes away clean when inserted into the centre of the muffins).

Leave the cake to cool completely.

For the ganache, break the chocolate into small pieces into a bowl and add the cubes of butter. Heat the cream in a small saucepan on a gentle heat until it starts to bubble around the edges. At this point, take it off the heat and pour it straight over the broken chocolate. Leave to stand for 30 seconds, then beat with a spatula or wooden spoon until the chocolate has all melted and you have a shiny liquid ganache. Add the orange zest and stir through, then leave to cool and thicken slightly.

Once the cake has cooled, slice it in half and spread half the ganache over the top of the base layer. Sandwich by placing the top layer back on top, then spread the remaining ganache over the top of the cake.

Friday, 27 March 2015

Raspberry and Lemon Bakewell cake

Raspberry and Lemon Bakewell cake

Do you ever find yourself wishing you were something you are not? On the days when I’m not wishing I were Marion Cotillard or Alexa Chung, or some other such ethereal beauty, I’m usually daydreaming about being Spanish. First of all, I have it in my head that all Spanish women are perfect (tanned skin, thick, glossy hair, beautiful figures, natural sophistication and elegance); secondly Spanish food is pretty yummy; and thirdly, the clincher perhaps for me, there’s the language. Surely the most beautiful language in the world?


Raspberry and Lemon Bakewell cake

The problem - besides the fact that I patently am not and never shall be a Spaniard - is that I am somewhat fickle. As much as I wish to be Marion or Alexa today, yesterday I hoped I might magically metamorphose into Ashwariya Rai or Priyanka Chopra. And so it follows that as much as I would like to be Spanish at this moment in my life, not so long ago, I dreamt of being Italian (something to do with the women being perfect, the food yummy and the language beautiful…) Tomorrow I will probably be sighing mournfully over the fact that I am not both Japanese and Beyonce.  


Raspberry and Lemon Bakewell cake

I can hear my mumma’s exasperated words even as I write this blog “Why you can’t just be happy with who you are, I don’t know!” And of course, you and I both know she is right (as always). Perhaps it’s just the nature of the world we live in today - to always want more, to see what others have and aspire to that, rather than to be grateful for who we are and what we ourselves have.

And so I come to the painful and heart-wrenching conclusion that I must give up on my dream of being una chica española and instead embrace who I am. If I’m honest, being me isn’t really all that terrible at all. I mean yes, there’s a somewhat bulbous nose to contend with, but in the grand scheme of things, I can live with that. Besides, if the rumours are to be believed, Queen B survives on cucumbers alone, which means none of this cake for her. On that basis alone, I think I’ll stick to being me.

Raspberry and Lemon Bakewell cake

I do like this cake. So much so that I baked it twice over the Mother’s Day weekend and everyone who ate it seemed to like it too. I always feel raspberry and lemon is a winning combination, and when you throw ground almonds into the mix, the result is a deliciously damp sponge that tastes pretty perfect with a dollop of cream on the side.


Raspberry and Lemon Bakewell cake

Adapted from Rachel Berry's Raspberry Bakewell Cake

Ingredients
Serves approximately 10-12

  • 150g butter or Stork, softened to room temperature
  • 150g golden caster sugar
  • 2 large eggs
  • A few drops of almond extract (I used about 1/4 tsp)
  • Zest of one lemon
  • Juice of half a lemon
  • 150g self-raising flour
  • 150g ground almonds
  • 250g fresh or frozen raspberries (if frozen, allow them to defrost somewhat, but it's not the end of the world if they're not thawed out when adding them to the cake)
  • About 150g of good quality lemon curd
  • 25g or about 2tbsp flaked almonds
  • Icing sugar for dusting
  • Extra thick double cream or custard to serve (optional)
Preheat the oven to 180C/160C fan.

Grease the base and sides of a deep 20cm loose-bottomed cake tin, then line the base with baking parchment.

Throw the butter, sugar, eggs, almond extract, lemon zest and juice, flour and ground almonds into a food processor and blitz until well combined.

Spoon about half of the batter into your cake tin and smooth it out evenly.

Scatter the raspberries over the top, then place heaped-teaspoon sized blobs of lemon curd randomly over the batter too.

Gently spread the remaining half of the cake batter over the top, and again smooth out evenly before sprinkling over the flaked almonds.

Bake for 50 minutes, then remove from the oven and allow to cool for about 30 minutes in the tin.

Once the cake has cooled, you may need to run a palette knife around the edges to loosen the edges from the tin. Remove from tin and allow to cool fully on a wire rack.

When ready to serve, dust with the icing sugar and enjoy with cream or custard.

Friday, 27 February 2015

Lemon and mascarpone oat biscuits

Lemon and mascarpone oat biscuits

I have a little picture up in my bedroom with a statement on it that reads "I am fairly certain that given a cape and a nice tiara, I could save the world". Now obviously this is true, but sadly I am in possession of neither a cape, nor a nice tiara, which may explain why there's been a lot of turbulence and trauma in my life of late, both of which show no sign of abating any time soon.

Lemon and mascarpone oat biscuits

I suppose there's a possibility that I'm being melodramatic and that things aren't as bad as they might seem, but when one finds oneself randomly, and unprovoked, bursting into uncontrollable sobs on a busy tube platform, usually that right there is a sign that all is not as it should be!

Lemon and mascarpone oat biscuits

The real sign, however, came when I went out for dinner the other day. It was all going swimmingly until it came to dessert and, for some bizarre and unfathomable reason, I rejected the chocolate options - indeed, I rejected any sugar or gluten-based options - and instead went for the cheese board. I don't really know what I was thinking. Evidently I wasn't thinking. Don't get me wrong, I love cheese but as we all well know, its rightful place is in a toasted sandwich, not on a dessert plate.

Lemon and mascarpone oat biscuits

My strange decision made me realise that it's probably time for me to go in search of the elusive cape and tiara in order to right the wrongs of the world, or at least to stop me from denying myself of a proper dessert ever again. Whilst I pootle off on my search, here are some mascarpone and lemon-filled, pistachio-topped oatie biscuits for you.

Lemon and mascarpone oat biscuits

Adapted from Nigel Slater's Oat and lemon cookies

Ingredients
Yields 6 large sandwiched biscuits or 8 average sized biscuits
  • 120g butter, softened to room temperature
  • 120g light muscovado sugar
  • 1 large egg yolk
  • 120g porridge oats
  • 90g plain flour
  • ½ tsp baking powder
  • Pinch of Maldon or other sea salt
  • 20g pistachios, chopped roughly
  • 100g mascarpone
  • 100g lemon curd
Preheat the oven at 180C (160C fan).

Beat the butter and sugar together until light and creamy, then mix in the egg yolk.

Once combined, add in the oats, flour, baking powder and salt and mix through until the ingredients bind together cleanly.

Divide the mixture into 12-16 cookies depending on how large you want them to be. Roll the divided pieces into balls then flatten into roughly and place on a baking sheet lined with greaseproof paper. Keep them about 4-5mm in thickness, so they remain chewy after baking. Note that I followed Nigel's instructions and made 12 biscuits, each about the diameter of a Digestive biscuit, but they expand in the oven so end up much larger than a Digestive! Next time I would make them smaller.

Sprinkle the chopped pistachios over half of the biscuits, pressing the nuts lightly into the dough.

Bake all the biscuits for 11-12 minutes, until they are lightly golden, then remove the tray from the oven and leave the biscuits to cool for a minute or two before transferring to a cooling rack. As they cool they will crisp up.

To make the filling, place the mascarpone in a mixing bowl and stir in the lemon curd, mixing well to combine and to get a smooth, creamy mixture.

Turn the biscuits that aren't topped with pistachio upside down and place a good dollop of the mascarpone mix on each. You can spread the mascarpone a little with a palette knife but don't spread it to the edge of the biscuits as it will ooze out. Cover with the pistachio-topped biscuits.

Saturday, 31 January 2015

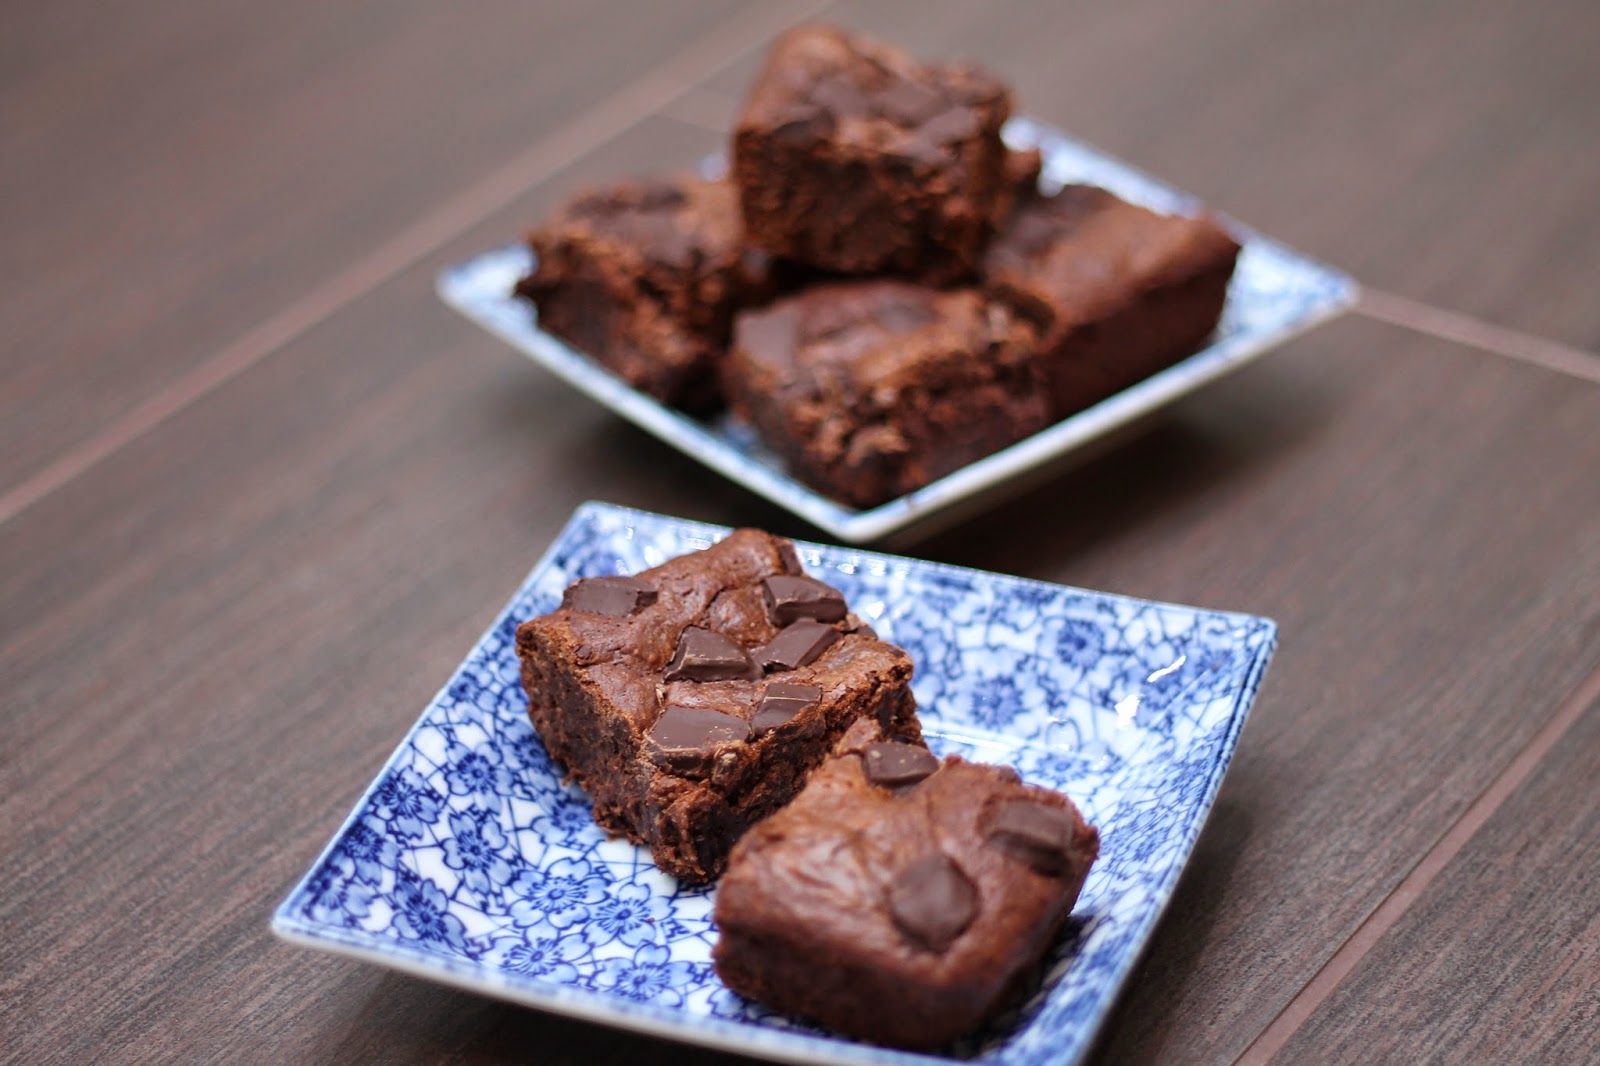
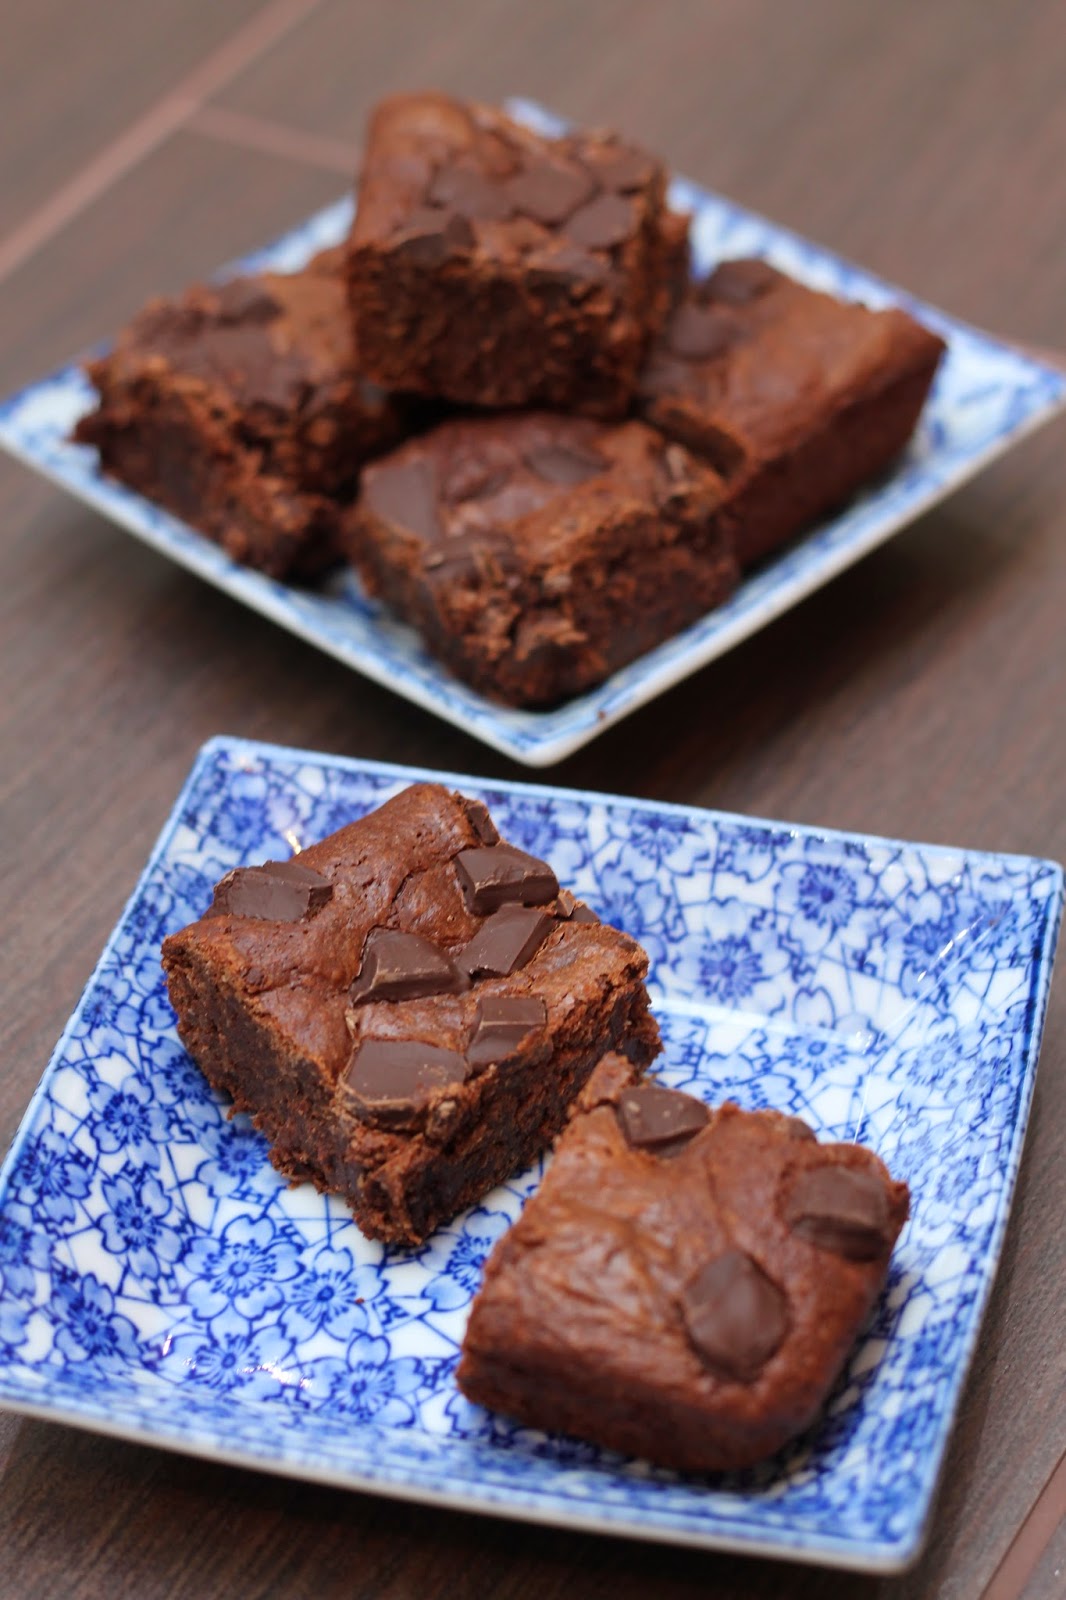
Coconut chocolate-chunk brownies

Coconut chocolate-chunk brownies

I have a confession to make. A few weeks back, during a holiday to Spain, I was feeling rather pleased with myself for how well I was getting by gibbering away in Spanish with the locals. Needless to say, my smugness came back to bite me on my not insubstantial bottom when I asked the receptionist if 'las sartenes' in my hotel room could be changed. After a few moments of scrutinising me closely to see if I was quite all right in the head, the receptionist kindly suggested perhaps madam meant ‘las sabanas’, since he assumed - correctly so - that it was probably the bedsheets that I wanted changing rather than the, umm, frying pans...

Whilst I’m in an "honesty is the best policy" frame of mind, I have another confession to make: last week I baked a chocolate cake with a view to posting it on this blog, but rather than going on the blog, the whole thing went in the dustbin. It was dry, sickly sweet, and the frosting so runny that the top layer kept slipping off the bottom layer, no matter how many times I tried to firmly sandwich them together. The end product looked not unlike something scooped up by dog owners (the polite ones anyway), when they’re out taking Coochie-Woochie Waa-Waa for walkies.


Coconut chocolate-chunk brownies

There’s a reason I’m confessing these things to you, dear reader. It strikes me that in the world we live in today - a semi-virtual world conducted through Twitter, the Book of Face, Instagram and the like - it’s often easy for people to portray their lives as flawless, magnificent and wonderful at all times, making the person on the other end of the internet feel as though their own life is a little, well, lacking, in comparison. We all know someone with 1,654,000 close friends on Facebook, or that person generous enough to regale us with weekly photos of themselves tanned and toned in their swimwear.

So I’m telling you about my blush-inducing error in Espana and my baking disaster to reassure you that, whilst I might give the impression that I am a fluent Spanish-speaking domestic goddess, I’m really just as capable as the next person of making a buffoon of myself and that, even as a cake blogger, I don’t always get it right.


Coconut chocolate-chunk brownies

After the disastrous dog-poopy cake, I wanted to bake something simple and easy that I knew wouldn’t go wrong, which meant brownies. This recipe is from a chocolatier whom I love, Paul A. Young. I’ve bought brownies from his stores before and they’re amazing. Dense, rich and intense. So intense that sometimes the best approach is to nibble away at the brownie over a few days. These coconut brownies are the same. I adapted them slightly, adding more coconut and sprinkling some chocolate chunks on top (in place of cherries), because as you and I both know, I can’t help myself. Try them. I promise you, you won’t throw them in the bin.

Coconut chocolate-chunk brownies

Adapted from Paul A. Young's Bing cherry and coconut brownie in 'Adventures with Chocolate'

Ingredients
Makes about 16 brownies
  • 100g unsalted butter
  • 250g golden caster sugar
  • 75g golden syrup
  • 275g dark chocolate (70% cocoa), broken into pieces
  • 4 medium eggs, lightly whisked
  • 70g plain flour
  • 100g unsweetened desiccated coconut
  • 85g plain chocolate (50% cocoa), chopped into chunks
Preheat the oven to 160C and grease and line the base and sides of a deep, square baking tin (mine was about 18cm x 18cm x 4cm).

In a large saucepan, melt the butter, sugar and syrup on a low heat, stirring occasionally to mix (might I implore you to take a moment here to inhale the smell of the glorious sticky syrupyness and wonder at its deliciousness?)

Once the mixture is all melted and combined (note that it will remain grainy from the sugar), take it off the heat and add the dark chocolate pieces, mixing to melt the chocolate through.

Add the whisked eggs and beat thoroughly into the chocolate mixture, before adding the flour and coconut and giving one final thorough mix.

Pour the brownie batter into your baking tin and then sprinkle the plain chocolate chunks evenly on top.

Bake for 20 minutes before removing from the oven.

Allow to cool, then refrigerate in the tin for at least 4-5 hours before cutting into squares and chowing down!